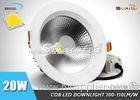
High Brightness 20 W Recessed LED Downlight Fixture Epistar Edison LED Down Lights
Quick Detail:
Voltage : AC85-265V
Chips Brand : Epistar
LED : COB LED
Size : 6inch
Cut out : 170mm
Certification : CE / ROHS
Body material : Aluminum
Dimmable : Available
CRI : 70/80
Features of LED Downlight
- Light source: Original Import COB LEDs(Epistar/ Bridgelux/Sharp)
- Long LED life: More than 50,000 hours,Energy saving efficiency is 80%
- LED Downlight Function: Dimmable,Color change and RGB optional
- LED Downlight type: External isolated constant current driver
- LED Downlight Power factor:>0.95 No UV or IR light radiation
- Eco-friendly,No mercury or other inorganics
- Highest optical efficiency: 90~100 lumens per watt
- Homogeneous flood illumination
- Aluminum housing with excellent thermal efficiencies
- warm white:2800K-6500K,natural white:4000K-4500K,6000K-6500K.
- Excellent aluminium heat dissipation body
- 20w LED Downlight can achieve directional light output equal to traditional 120w halogen lamp
Specification
|
Product Model |
SP-COB-XN-20W |
|
Input voltage |
AC85-265V |
|
Freqency Range |
50/60Hz |
|
Housing material |
Aluminum body |
|
Led Consumption |
20w |
|
System Consumption |
21w |
|
LED Brand |
Epistar |
|
Chips quantity |
100PCS |
|
Luminous flux |
1800-2000LM |
|
Color temperature |
2500-10000K |
|
Color Rendering Index |
>80 |
|
Emitting angle |
120° |
|
Size |
D190xH65mm |
|
Working Temperature |
-40 +55 |
|
Lifetime |
50000 Hours |
|
Certificate |
CE/ROHS |
|
Cut out |
170mm |
|
Quality guarantee |
3 Years |
|
Waterproof class |
IP44 |
Dimension

Packing
 |
Model | SP-COB-XN-20W |
| Net Weight | 0.8KG | |
| Inner box size | 26x22x9CM | |
| Outter carton size | 55x45x51CM | |
| Carton G.w | 25KGS | |
| Pcs/carton | 20PCS / CTN |
Inatallation instructions Recessed LED Downlights
1. Switch off the power.
2. Ensure that the void depth is a minimum of 90mm, the thickness of ceiling is a maximum of 20mm.
3. Cut a hole using an appropriate tool according to the cut-out.
4. Connect the wire of the driver to mains(85-265v)in a correct way,put the driver into the ceiling properly.
5. Push the spring clips upwards and fit into ceiling hole, ensure the product is sitting properly in hole.
6. Screw lighting engine as shown in figure 5 and 6, and install reflector and frame.
7. Switch on the power if above steps done properly without any mistakes.